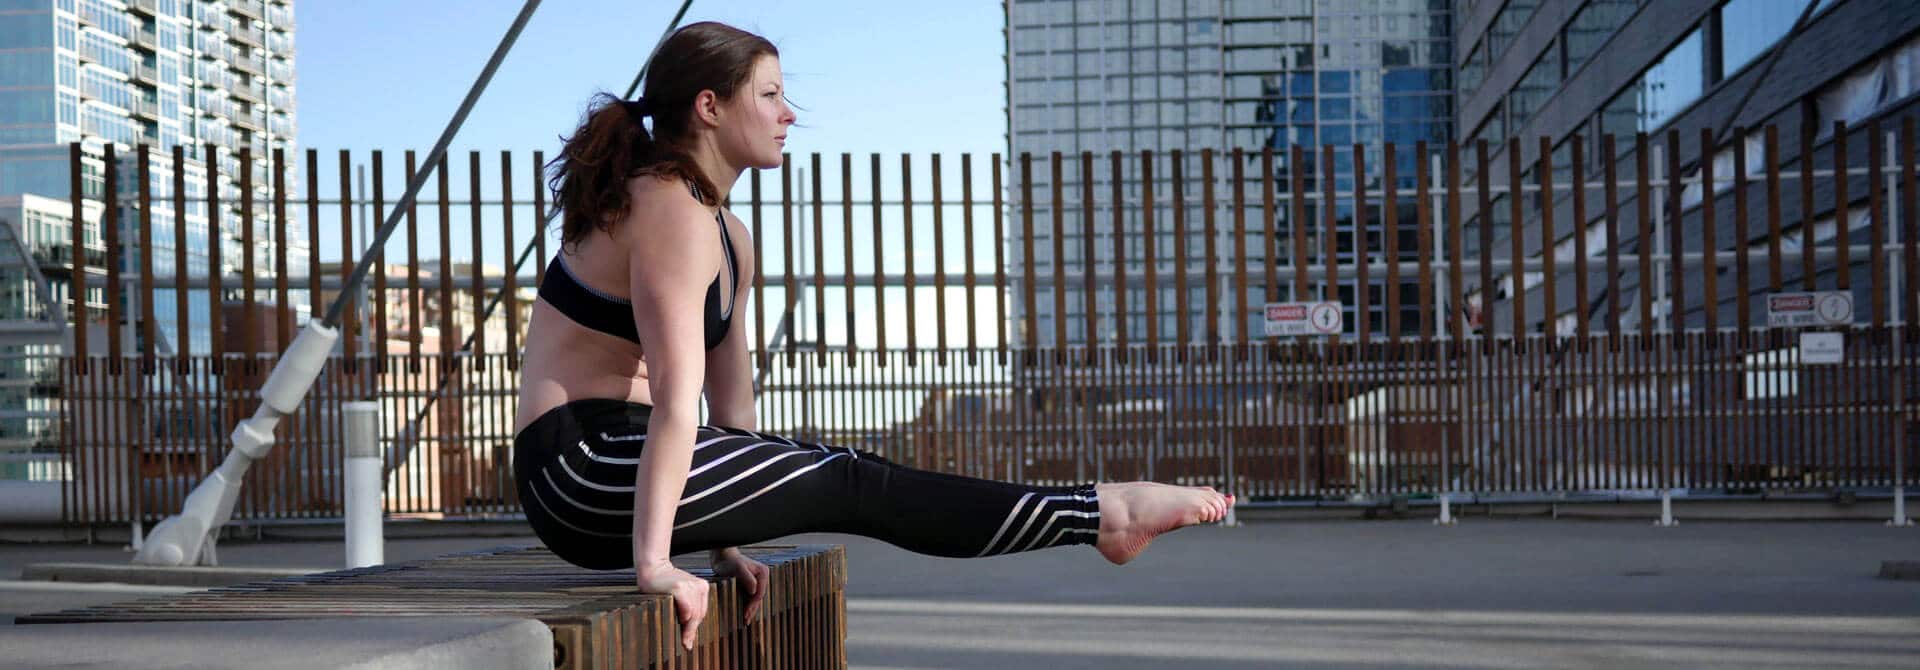
Use L-Sits to Sculpt Your Body from the Ground Up

These days, social media is filled with pictures and videos of people performing impressive stunts and mind-blowing body maneuvers of all sorts. Sometimes, it seems almost impossible to scroll through your news feed without running into a post featuring someone on a beach somewhere doing a crazy exercise routine.
While these social media shares are intriguing and often entertaining, to most of us, they can be a little disheartening. But when you break down these seemingly impossible exercises into individual, progressions, and steps, they quickly transform from an unattainable dream into a tangible goal! Mastering your L-sit will help you to break down barriers and begin conquering your fitness goals by strengthening and sculpting your core and upper body. These simple progressions will help you to build your L-hold one step at a time. Give them a go!
Step 1: Activate Your Hip-Flexors and Core
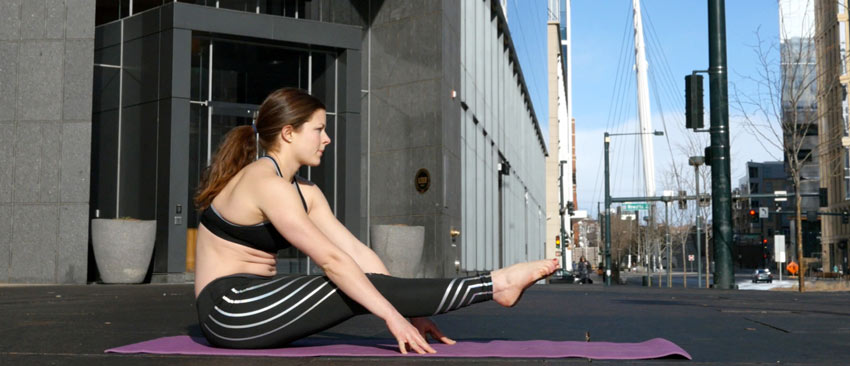
Learning to do an L-Sit is all about teaching your body how to use the right muscles and strengthening them in the correct position. If you have ever tried to hold an L on your own, you might have felt awkward or clumsy as you attempted to push your body off the ground and into position. Without knowing which muscles to use, or what an L position feels like, it’s extremely difficult to get your feet off the ground. That’s why activating the correct muscle groups is the first step in building your L-sit. Seated Pike Lifts will help you learn which muscles to use as you hold your L. Here’s how:
- Start by sitting down on the ground with your legs extended in front of you, then place your hands on the ground next to your knees.
- Keeping your glutes and hands in contact with the floor, lift one leg directly upward towards your face. As you do this, make sure that both of your knees stay straight. If you are unable to lift your leg with your hands placed next to your knees, move them closer to your glutes to make it easier to get your leg off the ground.
- Complete 5 reps on this leg being sure to lift it as high as you can on each rep, then on the other leg, then while lifting both legs simultaneously. Do 3 sets of this exercise.
If you find that you are still unable to lift your legs off the ground after moving your hands closer to your glutes, you can make things even easier by placing them on an elevated surface such as a stack of books or some yoga blocks. As you improve, begin moving back towards the original position described above. If 3 sets of 5 reps is too easy, try increasing to 3x7r then 3x10r. Seated Pike Lifts will teach you to activate, and begin strengthening your core, hip flexors and quadriceps in the L position.
Step 2: Increase Strength and Endurance for L-Sits
After becoming more familiar with the L position and the muscles that you should activate to keep your legs off the ground, it’s time to increase your strength and endurance with Static Seated Pike Holds. This exercise will require more strength than Seated Pike Lifts and will begin to sculpt your core as you get one step closer to a perfect L-sit. Get ready!
- Have a seat on the ground in the same position as you did previously with your legs extended and your hands placed on the floor next to your knees.
- Once again, keeping your hands on the ground and knees straight, lift one leg towards your face. This time, rather than lowering it to the ground right away, you are going to do a static hold at the very top of your lift.
- Hold this position with your leg as close to your face as you can for 7 seconds, then the other leg, then with both legs simultaneously to complete the set. Do 3 sets.
Increase your strength with cool exercises like this from the GB Online Courses!
During your Static Holds, you are also welcome to move your hands, if needed, to decrease the difficulty of your hold. Once you are able to do 3 sets of 7 seconds, try 3x10s then 3x15s. You can also make this exercise more difficult by reaching past your knees towards your ankles. The closer you can get your hands to your ankles, the more prepared your core, hip flexors, and hamstrings will be for your L-Sit!
Step 3: Activate and Include Your Upper Body
Now that you have spent time activating and strengthening your muscles in the pike position, you’re ready to include your upper body by learning to press off the ground. Just as before, activating the right muscles in the correct position is an essential part of perfecting your L. To do this you will need to place your hands on an elevated surface for Shoulder Shrugs. Yoga blocks are the perfect tool for the job, but you can also use household items, such as books or chairs, that can be placed on either side of you. Do your best to ensure that your setup is level so that your hands are positioned at the same elevation. It will also need to be sturdy enough to support a moderate portion of your bodyweight. Once you are set up, give this a try!
- Have a seat on the ground in a pike position with the yoga blocks positioned next to your glutes on either side.
- Place your hands on the blocks and lift your glutes off the ground. As you do this, keep your legs extended with your feet on the floor.
- With a straight spine and locked elbows, use your shoulders to slowly shrug up and down. As you shrug, look straight ahead to help keep your chest open and your spine vertical. Do 1 set of 15 reps.

While this variation will most likely be easy for you, it will activate muscles throughout your neck, arms, chest and upper back. Lowering as deep as possible at the bottom and pushing up as tall as you can at the top of each rep will help you to feel the exact muscles you will use during your L-sit. After finishing your warm-up set, here’s what you do:
- Remove the yoga blocks and place your hands on the floor next to your glutes.
- While keeping your arms locked, spine straight, and eyes forward, shrug up with your shoulders using the same muscles that were activated during your warm-up set.
- At the top of your shrug, momentarily lift your feet off the ground using the muscles that you activated and strengthened with the Seated Pike variations, then touch them back down.
- Once your heels are back on the ground, lower out of your shrug back to a seated pike position. Do 3 sets of 10 reps.
As you become more comfortable lifting your feet off the ground at the top of your Shoulder Shrugs, try to add a 1-2 second pause on each rep. Adding a small pause to each rep will not only help you to increase your core and upper body strength but will also teach you how to balance in your L-sit. When you’re ready, try to lift your glutes and feet off the ground at the same time. Before you know it, you’ll have mastered your L-sit!
Step 4: Keep Training Your Compressions
After perfecting your L-hold, sculpting your core and upper body, and most of all, having fun learning a new trick that you can show off from time to time, you’ll be ready chase after your next goal. Mastering your L-sit is only the first of many physical milestones that you can achieve by taking your training one step at a time. Don’t stop there! Set your sights on the next challenge you want to take on! Whether you want to learn a Handstand, a Front Lever, or take on the Splits, the GymnasticBodies Courses will teach you how step by step – so go for it!

